Gapers Block has ceased publication.

Gapers Block published from April 22, 2003 to Jan. 1, 2016. The site will remain up in archive form. Please visit Third Coast Review, a new site by several GB alumni.
 Thank you for your readership and contributions. 

TODAY

Wednesday, April 24

Gapers Block
Search

Gapers Block on Facebook Gapers Block on Flickr Gapers Block on Twitter The Gapers Block Tumblr


Drive-Thru
« Put Your Signature on a Drink Pitchfork Dining (with a side of whining) »

Feature Fri Jul 17 2009

Lab Report: Homemade Yogurt

Introduction/Statement of the Problem.
I really do love yogurt. I love the tangy flavor of Trader's Point's yogurt; I enjoy mixing in a bunch of Milk & Honey Granola for some crunch and sweetness. The benefits of probiotics on the digestive tract are well-known, and a friend's nutritionist mother once advised yogurt to alleviate my seasonal allergies. Since I've started taking my coffee black, it's my best chance for calcium many days.


However... I hate most yogurt. Most mass-produced brands are either runny and sourly foul-tasting, or solidified with thickeners to the point that the yogurt resembles some sort of fruit-based Jell-O. None of this compares to the horror of the "fruit" on the bottom of many yogurts. Not even factory farm, tastes-like-nothing fruit deserves to become part of a grayish-brown slurry beneath cultured milk.

So I gravitate toward the few reliable brands I've found--Trader's Point, certain brands of Greek yogurt, and the fruit-free varieties of Wallaby when I want something a bit more portable. They're all quite good, and quite expensive.

So I was quite interested when I read a couple of articles about how easy and cheap it was to make your own yogurt, and how good the resulting yogurt was. I mentioned the idea at my small office, and found out that one of my coworkers made his own yogurt twice a week, with a culture he brought back from a trip home to India. He offered to give me some starter, but for this experiment, I opted to use a commercial Greek brand anyone could buy.


Hypothesis.
My homemade yogurt would be tasty and cheaper than store-bought.

To complicate my experiment, I also decided to use two different kinds of milk: a local farm's whole milk and a standard commercial 2% milk. I'd read that yogurt made from the 2% milk would be inferior to the whole milk, so I decided to test it out.

Materials.

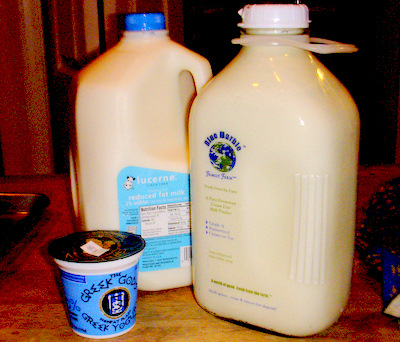
  • 4 cups of Blue Marble Family Farm Whole Milk, purchased from Green Grocer Chicago. $5.99 (plus bottle deposit) per half gallon. I didn't realize until later that this was a cream line milk, which may have introduced error in the experiment.
  • 4 cups of Lucerne 2% Reduced Fat Milk, purchased from Dominick's. $2.99 per gallon on the day it was purchased.
  • 2 tbsp starter yogurt (I used Greek Gods brand Greek yogurt, mainly because it was available where I was shopping.)
  • dairy.JPG
  • Beeline honey
  • 2 quart pot
  • Four large ceramic bowls
  • Plastic wrap
  • Sieve
  • Cheesecloth
  • Spoons and glasses
  • Space heater

Procedure.

  1. For each batch of yogurt, I heated the milk in a 2 quart pot to the point that bubbles began to form around the edges of the pan. I then turned off the heat, and let the milk cool until it was baby bottle warm (that is, I tested it on the crook of my wrist; it was ready when that temperature felt comfortable).
  2. Pour the milk into a large ceramic bowl. Stir 1 tbsp of starter yogurt into the warm milk. Mix thoroughly, cover with plastic wrap, and let sit overnight in a warm place. I conducted my experiment during a cold snap, so I rigged a corner of my room with a space heater on low.
  3. process.JPG
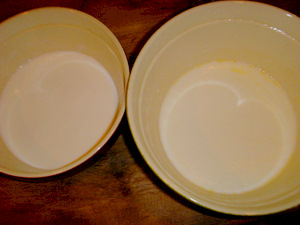
  4. The next day, line a sieve with cheesecloth, then pour the yogurt in and set this over another ceramic bowl. Let the yogurt drain until it reaches a consistency you'd like, which was 45 minutes for me. (One of the articles I read suggested you could keep the whey drained off of the yogurt and use it as a liquid in baking, but when I attempted this, the way seemed to kill my yeast. I wouldn't recommend it.)
  5. Store the yogurt in the fridge. It will keep for up to a week, but is best within the first few days.

Results and Observations.
Before I made the yogurt, I tasted both of the milks I'd chosen. It was at this point that I discovered the Blue Marble was cream line, with a thick plug of butterfat at the top of the bottle. I like this kind of milk, but I've never been able to shake it enough to disperse the chunks of fat completely, and doubt it could be done without the assistance of a paint mixer. Therefore, my sample of Blue Marble had little pellets of butterfat floating in it (not that I'm complaining). It coated my mouth completely, and the milk had a very rich, mild sweet flavor in addition to the velvety texture. The Lucerne tasted watery and somewhat paste-like in comparison.

During the heating process, the chunks of butterfat melted and hovered on the surface of the warm milk; I was concerned that it wouldn't integrate with the rest of the milk, but when I stirred in the yogurt, everything seemed to combine. There was some visible fat the next morning, after the yogurt had solidified, but by the time I stored it in the fridge, it was no longer noticeable.

One surprise--I'd imagined the thinner 2% milk would give off more whey during the draining process, but the whole milk yogurt gave off almost 1.5 cups, while the same amount of 2% milk shed a little under a cup of the liquid. If anyone knows what I could actually do with this liquid, I'd like to know.

materials.JPG
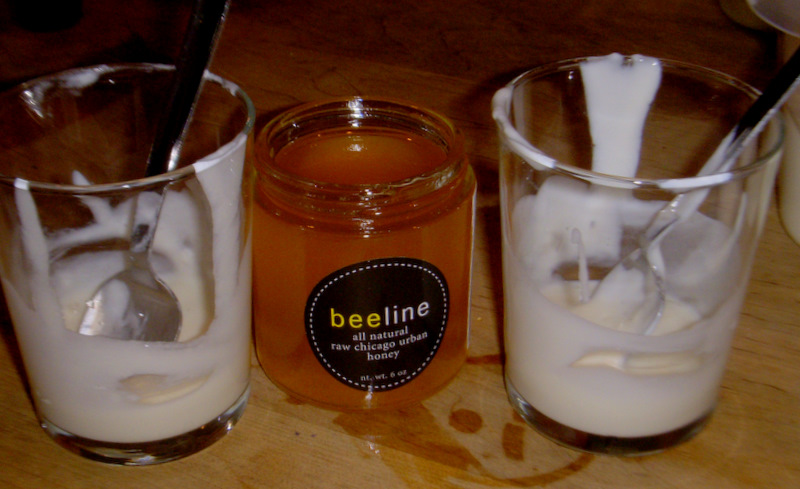
Now, to the taste tests. The whole milk yogurt was terrific. It was thick, it was tangy without being sour, it was rich, and apart from the Trader's Point plain, it's the only yogurt I'd eat plain. The addition of a half-teaspoon of honey only slightly increased the sweetness, perhaps because the taste of the yogurt itself was so strong. The 2% milk was more sour than the whole milk, and not quite as good, but the addition of honey completely eliminated the sour flavor and brought it close to the flavor (if not the texture) of the whole milk yogurt.

I ended up using the whole milk yogurt as a straight "eating" yogurt, while the 2% milk went into a few smoothies. I also had each of the yogurts with a few mix-ins, including the aforementioned Milk & Honey granola. I also stirred in a spoonful of Blue Chair preserves from my last trip to Oakland, along with a little honey; this is how fruit should be incorporated into yogurt. One improvisation I ended up really enjoying with the 2% yogurt: a little bit of honey and a little bit of pomegranate molasses. I bought a some pom molasses for red pepper dip awhile ago, and love finding new ways to use the rest of the bottle. This one is quite tasty.

Conclusions.
The whole milk yogurt I made ranks right up there with my favorite store brands, but at a much lower cost (I still had half of that bottle of milk left over, after all). I probably won't use a cream line milk in any subsequent batches, but I'll likely stick to whole milk. My co-worker swears by Oberweis for his yogurt, but I may stick with a TJ house brand to cut down costs even more. I'm curious about what fat-free homemade yogurt would taste like, but I'm not likely to spend my time and money on what I'm pretty sure would be a weaker batch of yogurt. Further experimentation is called for, though.

In short: Success! I'll certainly be doing this again.

 
GB store

pk / July 17, 2009 7:18 AM

a few things:

the optimal temperature range, if you're actually measuring, is 112-116° F. i get the best results at around 113.

i just stir the whey back in. it happens the longer you let the yogurt cure. just time it to the point that it's beginning to separate, then take off the heat.

you can find a yogurterie on amazon for about $40-$50 or so. mine has been in constant use for 2 years twice a week, so the cost is worth it for consistent temperature management.

Kati / July 17, 2009 7:26 AM

It is great to hear you enjoyed the yogurt and plan to make it again. I think homemade is the best because you make the flavor and texture as you and your family like it.

I've been making yogurt for a long time and have a hard time touching the store bought kind. I learned a few tricks over the years and maybe you'll find them useful in your future batches.

Instead of putting your yogurt in the corner with a space heater, just let it sit on the pilot light overnight. If you don't have one, use a heating pad.

To strain the yogurt I made a bag out of muslin and let it hang on the faucet in the sink--you could put a sieve under neath if your faucet is low. (I've now proven I'd much rather eat the yogurt than wash the dishes.) You can also use the old school paint bags or other cotton type bag. The longer you strain it the thicker it gets so at some point, I take enough out for yogurt and continue straining to get cheese. Great for toast or on crackers.

For ingredients, I save off a bit of yogurt from the last batch to make the next batch and I also use 2% milk--Dean's, Jewel brand, whatever's available and on sale. After scalding, I add in two tbsn of fat free milk-solids. This will give you more yogurt and not as much whey if using lower fat milk. It makes pretty creamy yogurt without a lot of the fat or the cost.

I make a gallon at a time as our family has it for dessert almost every night and I save some for the next batch. This will depending on the price of milk in your area, this recipe will cost you about $3.50--including the milk solids.

To eat it, you can also use agave nectar to save on the sugar consumption a bit.

liz / July 17, 2009 10:46 AM

You can also do this in your crockpot!!


Slow-cooker yogurt

8 cups (half-gallon) of whole milk

1/2 cup store-bought natural, live/active-culture plain yogurt

Plug in slow cooker and turn to low. Add the milk. Cover and cook on low for 2- 1/2 hours.

Unplug cooker. Leave the cover on, and let it sit for 3 hours.

Scoop out 2 cups of the warmish milk and put it in a bowl. Whisk in yogurt. Then dump the bowl contents back into the cooker. Stir to combine.

Put the lid back on the cooker. Keep it unplugged, and wrap a heavy bath towel all the way around the crock for insulation.

Go to bed, or let it sit for 8 hours.

Chill in a plastic container in the refrigerator. Your fresh yogurt will be good for seven to 10 days. Save 1/2 cup as a starter to make a new batch.

Mr. Damon / July 17, 2009 11:06 AM

Local agrinaut and homebrewer Nance Klehm wrote a piece for Arthur about "human-incubated" yogurt. That's worth checking out, also.

Jenn / July 17, 2009 12:04 PM

*Where do you find milk solids?
-Also, I've been making my own yogurt for a while now, most recently with 1% milk, which still turned out creamy and not sour. I've used several things to flavor the yogurt as well, such as some coconut milk, fruit, or extracts. I've been trying savory yogurts, too!

Kati / July 18, 2009 7:43 AM

I've found milk solids at the more specialty stores...on a rare occasion at the local grocer. The brand I've found that works well is Saco. Carnation Instant milk may work but I've found this works better.

ballpeen / July 18, 2009 10:26 AM

same/similar instructions for making soy yogurt?

Kate / July 19, 2009 1:44 PM

I make yogurt and save the whey for a postworkout beverage--it's refreshing cold and that's the perfect time for a little extra protein. Or why not throw it in your smoothie?

Pete / July 20, 2009 11:01 PM

I've been making yogurt for years. Here's a few thing I find helpful:

Use a thermometer. Accurate to within 2 degrees F and precise enough to be able to resolve 2 degrees F. In other words, you should be able to measure say, 110 degrees and be confident it's not 108 or 112 degrees. The crook of your arm is just not reliable enough to get consistent results.

The milk you use is important. I wouldn't consider using reduced fat milk; my preference. Organic milk, while warm, fuzzy and probably pesticide free, does not make good yogurt. It is high-temperature (ultra) pasteurized and does not support microbial life well. Cheap, local supermarket whole milk is best. I prefer Golden Guernsey brand. The milk of Guernsey cows has a good protein and fat profile.

Your starter culture is important. It will largely determine how your yogurt will taste. I've settled on using Stoneyfield Farm Yo-Baby plain yogurt. It has the best combination of flavor, culture strength and variety, price, and availability that I've found. In a pinch, I will use some left-over yogurt to start a new batch, but subsequent batches can get progressively weaker in culture strength. This has to do with the type of pasteurization(s) the fresh milk has gone through. A five to one ratio of fresh milk to starter is optimum.

Heat the fresh milk in a double boiler. I just place a 24 oz. stainless steel container into a medium saucepan of water. Heat the milk to 180 deg. F. You may hear that you should heat it to a higher temperature, or to put it in a pan directly over the flame, but I find that this imparts a scalded flavor to the yogurt and interferes with culturing. If the milk is very fresh, you may then immediately place the container in a large container of cold water. If the milk is "less than fresh", maintain the 180 degrees for 2 or 3 minutes, then cool.

Let the milk cool to 110 degrees F. Gently stir the starter into the milk. It's a good idea to prewarm the starter to about 100 degrees or so. Do not over-agitate as the microbes that you are working with are anaerobic, meaning they don't like air. Cover your container and put it in a place where the temperature can be steadily maintained at 110 degrees F for six to eight hours. Let the yogurt sit quietly and don't even bump the container. This can disturb the culturing and cause the whey to separate and the yogurt to become lumpy or grainy. Then chill the yogurt completely. The yogurt will usually culture well within four hours or so, but the consistency will be better and the flavor more tangy if you let it culture longer.

I use a picnic cooler with a little 5 watt terrarium heater to maintain the culturing temperature. Before I got the heater, I used to just put a couple jars of really hot water in the cooler with the yogurt to keep it warm.

This method consistently yields delicious yogurt with a custard-like consistency. Occasionally I like to strain the whey off to make Greek style yogurt that comes out with the consistency of Ricotta cheese. I'll strain it for eight hours using cheesecloth in a strainer over a bowl in the fridge.

I use the whey to do pickling (lacto-fermenting) of vegetables. It acts as a helper for the bacterial process and allows you to use less (or no) salt for pickling. This is a great way of preserving vegetables and it produces about the only way to get our toddler to eat raw vegetables.

rachael / July 21, 2009 9:23 AM

I've been making yogurt by putting the warmed up milk + culture in a wide mouth thermos & letting it sit overnight. Works like a charm. I learned that trick in one of Nance Klehm's workshops.

Raelynn / July 31, 2009 11:31 AM

can I use goats milk with succsess?

GV / February 6, 2010 4:24 PM

Just came across this column.

1. Milk varies a lot from brand to brand for making yogurt. I experimented with a number of 2% milks before settling on Trader Joe's non-organic 2% milk as the best yielding in taste and texture. Whole Foods 365 brand non-organic 2% was the next best. None of the other brands (Lucerne, Berkeley Farms, Strauss, Crystal farms, Horizon) could compete. Experiment with the brands available to you. How fresh the milk is on the shelves can also be a factor.

2. Heating to 180F and cooling to 110F seems optimal as many do.

3. For setting, I heat the oven to 180F, turn it off and put the inside light on. I stick the milk+starter here for 6-8 hours and it has been very consistent this way. Too wide a container spreading the mix out or too high a container making it deep can have an effect on the quality of the yogurt you get. Experiment.

4. The tartness depends on how long you leave it out than the type of milk. If it is too tart for your tastes, then store less outside in the warm. Keep unused yogurt back in the refrigerator as soon as it is served so it doesn't continue to sour.

5. You can drain the liquid whey if you don't want to mix it with yogurt and add it to the water to cook grains or pasta that absorb all the water. Cooking rice, cream of wheat, polenta, etc. Adds proteins to the carbs.

6. I have gone 20+ iterations just using the previous batch to the next. If you have the method above right, the number of iterations won't matter. It is necessary to keep some of the thick solid for the starter than just depend on the whey-diluted remains.

GB store

Feature Thu Dec 31 2015

The State of Food Writing

By Brandy Gonsoulin

In 2009, food blogging, social media and Yelp were gaining popularity, and America's revered gastronomic magazine Gourmet shuttered after 68 years in business. Former Cook's Illustrated editor-in-chief Chris Kimball followed with an editorial, stating that "The shuttering of Gourmet reminds...
Read this feature »

GB store


Events


Drive-Thru on Flickr

Join the Drive-Thru Flickr Pool.


About Drive-Thru

Drive-Thru is the food and drink section of Gapers Block, covering the city's vibrant dining, drinking and cooking scene. More...
Please see our submission guidelines.

Editor: Robyn Nisi, rn@gapersblock.com
Drive-Thru staff inbox: drivethru@gapersblock.com

Archives


 Subscribe in a reader.

GB store

GB Store

GB Buttons $1.50

GB T-Shirt $12

I ✶ Chi T-Shirts $15