


| « Super Food | Friday Foodporn: Tea Time » |
Feature Fri Jan 29 2010
Home Brewed In Chicago, Part 2: Engineer Your Beer
In the last article (found here), we discussed the four essential ingredients of beer. In this article, we're going to take a look a the equipment you'll need to set up your own homebrewery. Most brewing suppliers have a kit version of this equipment, and on average it will cost you anywhere from $75 to $150 depending on what's included. This may seem like an expensive way to get started, but a starter kit will usually save you quite a bit (as much as 20%) as opposed to collecting all this equipment individually.
Another advantage is that a well-considered starter kit should be customizable or expandable depending on your experiences and desires.
Once we've taken a look at the necessary equipment needed to brew beer, we'll also look at some of the "nice-to-haves" for the homebrewer.
The first thing you'll need as a brewer is a stockpot large enough to comfortably hold 2 gallons of liquid. 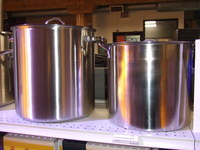 This will be your mash tun (brewing language for "beer stockpot"). Which means you'll want at least a 3 to 5 gallon stockpot. This isn't an item usually included in a starter homebrewing kit, so if you don't have something big enough, find your local restaurant supply and purchase a well-made, but inexpensive aluminum stockpot. You should be able to find something for about $15. Don't spend more than $20.
You'll also want a wooden spoon (for stirring your hot wort, of course). And speaking of hot wort, having a cooking thermometer on hand is particularly useful. A floating thermometer is even better.
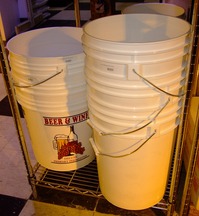
The first really specialized piece of equipment you'll need is your primary fermenter. Most homebrewers use a 6.5 gallon food grade plastic bucket with a tightly fitted lid with a hole drilled in it to receive an airlock.
Some homebrew stores sell ones with a draintap already fitted in the side near the bottom. This is a great feature for transfering your beer from one fermenter to the other. Otherwise you'll need learn how to siphon liquid from one container to another.
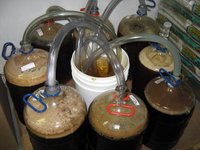
Another option is to use a 6.5 gallon glass carboy for your primary fermenter.
If you're going to use a carboy, you'll need a funnel to help move the wort from your stockpot into it, and if you're using whole grain malt or whole hops, the funnel will need to be big enough for a strainer or filter.
I mentioned airlocks with the primary fermenter, and they're intrinsically necessary for the successful fermentation of your beer. 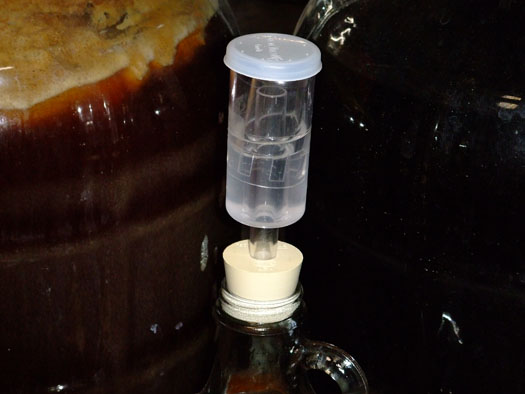 The purpose of an airlock is to allow the carbon dioxide produced by the yeast to escape (or you'd have a massive sugary sweet explosion as the carbon dioxide continued to build) without allowing dirty dirty air to enter your fermenter. As your beer initially ferments, you'll hear an occasional rattling as the escaping gas percolates through a watertrap much like the bend in your sink.
You'll need some rubber stoppers to firmly secure the airlocks in your fermenters. The stoppers should be fitted for both your primary fermenter (food grade bucket) and your secondary fermenter (carboy).
Another particularly specialized piece of equipment that you'll need is a hydrometer. 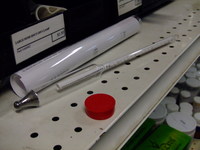 What the hydrometer measures is the specific gravity of a liquid against water, and helps a brewer determine the specific gravity of the wort, and the potential alcohol content of the final fermentation.
So far we have covered the some of the basic components for brewing. The next set of items are useful for moving your beer from one vessel to the other, as well as to the bottle, and eventually your mouth, stomach and liver.
When you move your beer from your mash tun to your fermenter you siphon it, but when you move it from your fermenters to your bottles, you rack it. The reality is that you're doing the same thing either way, but in the brewing process, they are considered two different actions.
Consequently, you'll need a racking cane and a bucket clip and some tubing. Another helpful tool for getting your beer ready for bottling is called a bottle filler, a short 8" tube with a spring loaded valve that allows you to accurately fill your bottles.
And speaking of bottles, you'll need quite a few: about 60 clean 12-ounce bottles (usually about $12 for 24) each time you brew a batch. Another option is to use 22-ounce bottles. You'll need fewer bottles, and the cost is comparable. Regardless of how big a bottle you use, you'll want to ensure that the bottles are not screw off cap.  You may have plenty left over or lying around, but they won't cap correctly, and you'll hear the caps shooting off in your pantry or closet as the final fermentation takes place in the bottle.
When it comes to caps, you'll need a bunch and a bottle capper. Usually the caps and a capper are included in a starter kit, but you'll need to purchase the bottles separately.
We've covered a lot of the essentials, so now we'll talk about some of the nice-to-haves.

First on the list are cleaning brushes. A bottle brush and a carboy brush make cleaning bottles and your carboy much easier. Another cleaning tool that makes short work of dirty bottles and carboys are jet cleaners, which use, you guessed it, a high pressure jet of water to remove stains and debris.
Another preference is to use a glass carboy for both your primary and secondary fermenter. While it's true that a carboy is heavy and you'll have to siphon your beer out of it, it is easier to clean, and harder to scratch (scratches harbor bacteria which can give your beer a funky taste).
Another "nice-to-have" item is an auto-siphon to replace your racking cane. Fermtech makes one that is easy to clean (very important!) and easy to use!
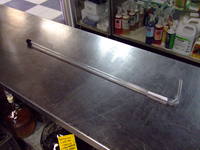
Finally, an immersion chiller is something that can be qualified as "very nice-to-have". It works by circulating cool (or cold) water through a circuit of pipes that you immerse in your hot wort. Essentially it's a heat exchanger that you immerse in your wort to cool it quickly. Since you should only add the yeast to the wort once it reaches 78° F, cooling your wort quickly can be an important step in preventing your very young beer from sitting around exposed to dirty dirty air. Of course, you could simply put a cover over your hot wort and wait for it to cool down. I would only recommend an immersion chiller for someone who knows that brewing is a hobby that they'll be pursuing for a long time, if not a lifetime!
Let's quickly review the shopping list:
- At least a 3 gallon stockpot ($15 or so)
- 6.5 gallon glass carboy ($33)
- Carboy brush ($4.75)
- Bottle brush ($2.75)
- 6.5 gallon food grade plastic bucket with a fitted lid ($17)
- Rubber stoppers for your bucket and carboy ($2 each)
- A couple of airlocks (I prefer the 3 piece types $1.25 each)
- A 6 foot length of 3/8" outside diameter hose (usually about a $1 a foot)
- Tubing shut off clamp ($2)
- A racking cane ($3.75) with a cane clip ($2)
- Large plastic funnel (anywhere from $2 to $10 depending of if you want "anti-splash" straining technology)
- 1 floating thermometer ($6, but a regular one will do in a pinch)
- Beer Hydrometer ($13)
- Beer bottles (60 12 ounce returnables will run you about $12 for 24, though I prefer "Grolsch" style resealable bottles myself which will cost you about $2 each)
- A beer bottlecapper ($15 if you're not using resealables)
- Bottle filler ($4)
- A big ole bag of bottle caps ($5 for 100)
One of the final items I'd recommend is Charlie Papazian's book: The New Complete Joy of Homebrewing. Pretty much every homebrewer views this book as THE bible of homebrewing. With it's folksy and fun writing, Papazian demystifies brewing and encourages the reader to practice the mantra "Relax. Don't worry. Have a homebrew." Easy-to-read and full of brewing history, practical advice for the beginner, and recipes and ideas for the intermediate and advanced brewer, The New Complete Joy of Homebrewing is one of the indespensible tools you'll use to brew your own beer.
In the next article, we'll look at putting together the ingredients and the tools to produce that delicious nectar of the gods: Beer!


flange / January 29, 2010 11:06 AM
i got a mr. beer kit for $20. self-contained, no trouble, no extra space in a tiny chicago kitchen required, and i got a really amazingly good, crisp ipa. a stout is fermenting on top of my fridge now. and i have no doubt that the serious beer student can tell the difference, but i'm somewhere between casual and serious, and i can tell mr. beer's stuff is better than what i'd buy but i don't think i could tell the difference between what mr. beer makes and what the serious beer student's setup makes.