| « Chicago's New Literary Community | I Met Gene Honda » |
Feature Wed Nov 11 2009
Making Stencils
Making your own stencils for artwork and decoration is a relatively easy thing to do -- it just takes a bit of time and patience. A stencil is a form of template used to draw or paint identical shapes and patterns and is usually made of a thin sheet of material such as wax-coated paper, cardboard, vinyl or mylar. What is perhaps most important about the material is it does not allow moisture to pass through.
There are several ways to make stencils, as well as different uses for each. Here, I'll cover how to make my favorite one-time-use and reusable stencils.
One-Time-Use Stencils
If you're making a one-time-use stencil like I tend to, contact paper works the best. It is easy to work with and not much fuss: just transfer your imagery, place the contact paper on your surface and cut away with a sharp hobby knife. This process allows you to make more intricate cuts and designs that are unencumbered by some of the dictates of reusable stencils, like the need for the islands (the unpainted spaces) to be connected by bridges (small pieces of material connecting the island area to the main stencil).
I've been using a hybrid of this type by using painters tape to affix large printable labels. The painters tape has a low tack adhesive that doesn't damage the surface, and the large labels can be printed with any printer or copier. The reason I don't adhere the labels directly to the work is the adhesive backing: it is super tacky, tends to be hard to remove and occasionally leaves a residue.
If you're interested in trying out this hybrid type, first prep the surface. The hybrid method seems to work best on smooth, clean materials like woods, plastic and the like, although canvas can be used if is super smooth. If you'd prefer to use paper, I find it works best to coat it with acrylic matte medium and then spray it with gloss clear spray paint. This two step process results in a relatively smooth surface.
Next cover the entire piece in the tape. If your image is small and you want to conserve the tape, mask off areas with newsprint, then take your large label and affix to the tape. Once everything is in place I use a handy hobby knife and cut out the design. Once the design is finished, apply spray paint in light even coats. Let the paint thoroughly dry, then remove the label and painters tape. This is essentially an airbrushing technique called a frisket.

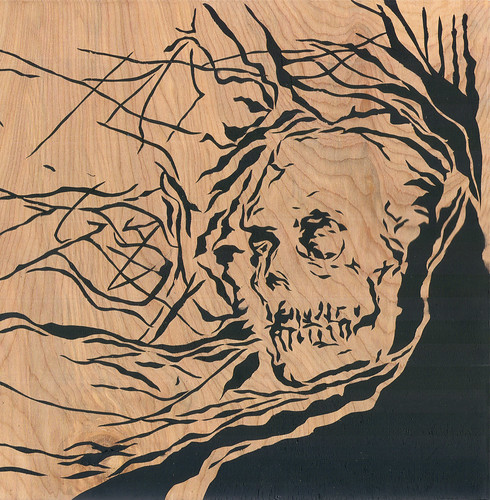
This is an example of a one-off stencil. Note the crisp lines.
This could have been done as a reusable stencil, as most of it
has bridges and islands except for the line work in the upper left.
Reusable Stencils
To make a reusable stencil I suggest using something like illustration board, which is sturdy and cuts somewhat easily. You can also use materials like acetate and mylar, but these materials tend to curl up at the edges, reducing line crispness and increasing overspray. The illustration board tends to have a bit of overspray as well, leaving soft borders. For lettering, hobby shops and hardware stores have precut letters that can be easily transferred to your board or used by themselves.
Begin with transferring your design to the board, making sure your design can hold up the image: remember the islands need to be held together by bridges, so simpler designs work best, but you can get complicated if you take your time. If you'd like, you can transfer your image with labels -- just affix the label to the board and cut. if your design calls for multiple colors, you may need to make multiple stencils: one for the undercoat and one for the top. If you plan on using your stencils for a while, I would suggest coating the board with an acrylic medium or gesso and maybe a thick coat of clear spray paint, sort of like how you would make a Collagraph plate in printmaking.

An example of a reusable stencil (left) and the spray painted image (right).
Note the overspray in the spray painted image.
Now you are ready to paint your stenciled image on whatever you like: apartment wall, your door, the set of coffee tables you picked up, whatever. If you are using the stencils to decorate a wall or piece of furniture and don't want to use spray paint, use a sponge and dab the not-so-wet paint through the stencil. Taping the stencil to the surface will help with alignment.
About the Author
Christian Scheuer, an artist, photographer and builder of things, works for a small gourmet bakery in Evanston, bringing sweet goodies to the masses in various coffee shops in and around Chicago. In his downtime, he makes "stuff for people who like stuff" and keeps a blog about his varied interests in design and things with wheels.


