


| « Food and Music Pairings | Friday Foodporn: Lettuce » |
Feature Fri Jul 16 2010
The Fruit of the Swine
I have been accused of having an unnatural love of bacon, and that's probably true. While I don't completely indulge in the recent surge in bacon-philia, I firmly believe that there isn't much that bacon cannot make better. Consequently, I've tried all sorts of brands of bacon, recipes using bacon, and even a lot of the "bacon-flavored" gimcrackery out there.
Being Southern and only a generation or two removed from the farm, I recently decided to try my hand at curing my own bacon. While my family never raised hogs, I have fond memories from family reunions of stories about curing and hanging of bacon and hams in the smokehouse mere steps from my great-grandparent's house.
As a child, I remember playing around the smokehouse and peeking in. Thanks to the convenience of supermarkets, the rashers and hams were long gone, but if you put your nose to the walls and inhaled deeply, you could still detect faint hints of the delicious smoky smell of the process that turned cheap cuts of salted meats into something luscious and sustaining.
I think it was those formative spring and summer days spent watching my grandmother and great-grandmother work in the kitchen, cooking and baking large Sunday meals, using salt pork and bacon for flavoring, that awoke a love of good cooking and hospitality in me.
So when a friend of mine hosted a soiree with a menu that included home-cured duck breast prosciutto, I was finally motivated to make my first foray into curing my own meats.
The first thing I did was what anyone from Generation Y does: go to the internet and do a lot of research.
I was initially directed to Michael Ruhlman's luscious duck prosciutto here and was immediately smitten. Once I found out about Charcuterie by him and Brian Polcyn, it was all over. Less a cookbook and more a manual, Charcuterie is the Penthouse Forum of food porn: sparse on the illustrations, but literarily dense, thrillingly epicurean, and ultimately satisfying. Every time I pick it up I think "I never thought that this would happen to me..."
Every. Time.
So after spending more alone time with the book than is probably healthy, I finally decided to take the plunge and make my own rasher of bacon. I'm going to go over the steps I took to porcine nirvana here, but I'd strongly encourage you to pick up a copy of Charcuterie and learn more about the process.
Starting off, here's the shopping list:
- A nice 5 pound slab of pork belly. Do yourself a solid, and ask the butcher to remove the skin if it's present.
- Kosher salt.
- Sugar.
- Curing salt (aka Pink Salt or Tinted Cure Mix or DQ Curing Salt or Insta Cure #1). This is really the only specialty item you'll need. If you ask for "pink salt" at your local market, some folks will assume that you mean Himalayan salt and direct you to the spice aisle. This is not what you want. You want a curing salt that is a mix of regular old sodium chloride and sodium nitrite (6.25%). It's tinted pink so that you won't mistake it for table salt and inadvertently use it to season your food. You can find pink salt (DQ Curing Salt) at Butcher & Packer.
- A two-gallon zip top bag.
That's it for shopping! Now onto makin' bacon!
The first thing you want to do is make the dry cure for the bacon. I'd strongly suggest you use a digital kitchen scale and measure the following by weight for the greatest accuracy:
- 1 pound Kosher Salt.
- 8 ounces of sugar (regular table sugar is fine, so is brown sugar).
- 2 ounces of pink salt.
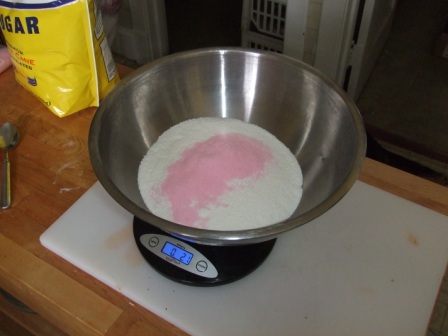
I combined these in a sealable container and shook the hell out of it to mix it up.
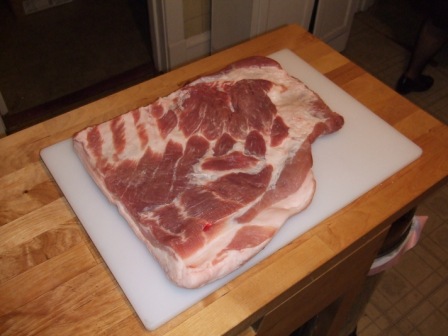
Next I prepared my pork belly. Since I was working with uncooked meat, I wanted to ensure that all surfaces and tools were clean and sanitized, and once I was done, I cleaned and sanitized those surfaces and tools again.
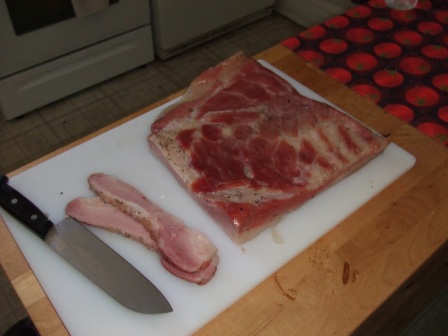
I removed the belly from the wrapping plastic and rinsed it well under cool water. Then I patted it dry with paper towels. As you can see here I've placed my dried pork belly on a cutting board to get it ready for the dry cure.
I poured my dry cure into a large roasting pan that's big enough to comfortably accommodate the pork belly and then dropped the pork belly right in. Then I went to work getting my hands dirty, flipping the slab of pork, and rubbing the dry cure into the belly; making sure to completely cover the surface with the curing mix. The goal is to get a nice even coat of the dry cure on the pork belly
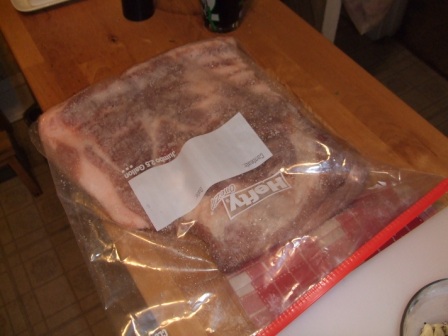
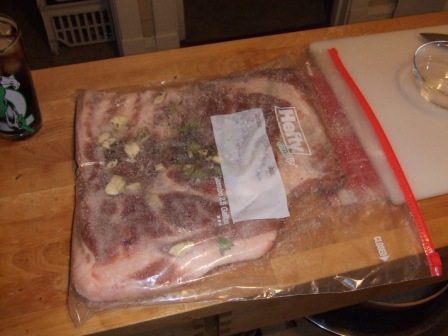
After a nice dredge through the dry cure, I immediately placed the pork belly into a 2 gallon zip top bag.
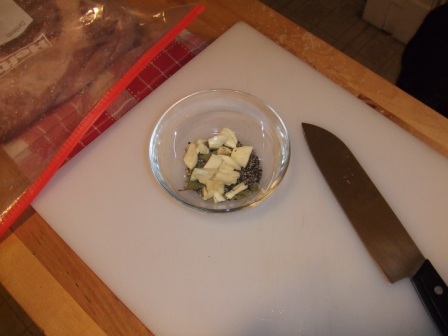
I wanted to add some additional flavors, so crushed and chopped a couple of garlic cloves, crumbled some bay leaves and used my cast iron skillet to roughly crush about a tablespoon of black peppercorns
I rolled the belly and bag up as I sealed it to ensure that I squeezed as much air out of the bag as possible.
Finally, I put the zip top bag into the refrigerator. I'd recommend that even though the pork belly is pretty well sealed inside a zip top bag, that you put the bag in a container larger enough to hold the contents without spilling. Trust me, the last thing you want to do is to clean curing brine out of the bottom of the 'fridge.
Now comes the hard part. The wait.
In Charcuterie, it's recommended that the bag gets flipped "to redistribute the cure liquid every other day." I don't have that kind of patience. I was flipping it every day, and even staring at it longingly and lovingly as time slowly marched on.
But as the week passed, I noticed that what was originally a slightly moist and very granulated environment had become liquid. That's because the salt cure pulls moisture out of the pork belly, and the bacon makes its own brine which carries flavors deep into the meat as osmosis ensures that water moves from a place of higher concentration (inside the cells of the meat) to a place of lower concentration (in the brine) and back again until a rough balance is reached.
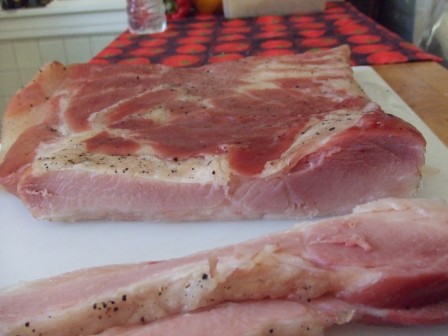
And at the end of that week, I could feel the difference. Where the pork belly was once soft, the bacon was now much firmer.
So I removed the bacon from the zip top bag and threw out the brine. Then I rinsed the rasher of bacon thoroughly under cool water, and patted it dry with paper towels.
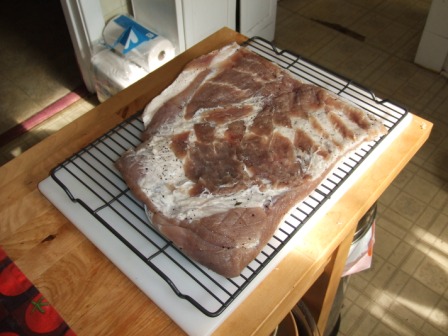
If you're going to smoke the bacon, it's suggested that you place the bacon back in the refrigerator uncovered for at least a day to allow a pellicle (a tacky, firm "skin" of sorts) to form. A large roasting pan with a rack is ideal for this.
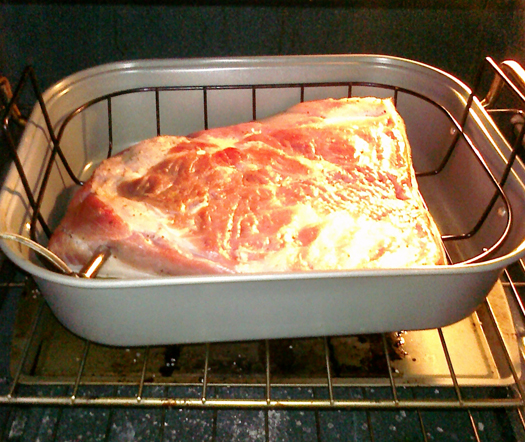
Since I don't have a smoker, I decided to simply roast the rasher of bacon in my oven. It wouldn't have the typical American smokiness, but would be more like a European style of bacon.
I set my oven for 170°F (the lowest it'll go), and used a probe thermometer inserted into the thickest part of the rasher to ensure it didn't go over 150° F.
Once the bacon registered an internal temp of 150° F, I removed the rasher from the oven, let it cool for about 10 minutes, then wrapped and refrigerated it. I won't deny I enjoyed a small delicious slice before I put it in the 'fridge.
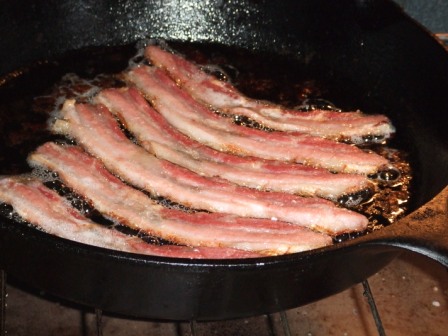
Since home-cured bacon doesn't have water injected into it like most packaged bacon does, you may find that it is almost too salty. To remedy this, I simply blanch the collops for a minute or two in simmering water, then rinse them in cool water before frying them up.
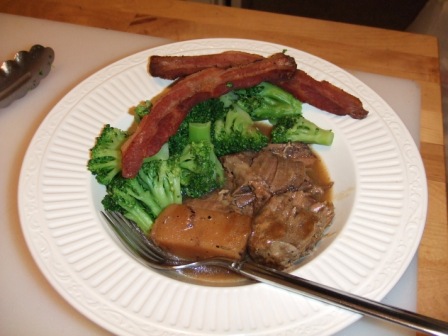
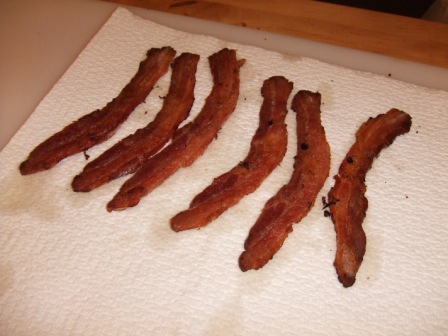
As far as preparing my bacon, I personally prefer a 400°F oven and a cast-iron skillet. Fifteen minutes on one side, and about 7 minutes on the other results in delicious crispy bacon each time.
The one major drawback to making your own bacon is that you may never go back to the store-bought variety ever again.
Again, this article owes a massive debt to Charcuterie since everything above is pretty much a chronicle of my effort at making the Fresh Bacon recipe in the book. To both Michael Ruhlman and Brian Polcyn, I wish to say "Thank you!"


Jen Bratanch / July 16, 2010 10:44 AM
Good for you, Cliff. Now where's mine?
Mmmmmmmmmm, bacon!